Showing posts with label recipe. Show all posts

Sunday, 26 October 2014

Super Vitamin Drink: Apple Beetroot Carrot Juice Recipe

Dear  Foodies Readers,


My juice obsession continues! After all how can you not turn into a bit of a juice addict??

There are SOOO many benefits(outlined later). Personally, I'm hooked because of the noticeably brighter glowing complexion, more energy for my workouts, and detoxification health benefits!  


You start craving the refreshed feeling you get after drinking these vitamin and antioxidant rich drinks- its hard to describe unless you've experienced it for yourself. What's more you get quite a few of your 5 a day fruits and veggies in one go. 


If you are a morning person have this or the green juice for breakfast kickstart your day.  My family refers to this simply as red juice or beet juice due to its bright red colour- you could call it ABC juice if you are in to acronyms. :)

This juice is best made with a juicer.

For those of you without a juicer I will posting modified blender recipe soon- but it will be for a beet smoothie. 

So without further ado, here's the recipe: 


A glass of Apple carrot beet juice on a tray

Apple Beetroot Carrot Ginger Juice Recipe

Serving size:1 small glass

Ingredients


1 red apple cored and quartered
1 beetroot peeled and halved
1 carrot lightly peeled if necessary and halved
1 inch ginger peeled (optional) I like the kick the ginger adds, if you don't you can leave it out.

Method:

1.Place ingredients one by one in juicer, and Juice away.
2.Serve with ice. Drink immediately!

Easy, healthy and tasty what more can you want?

Personally, I like the taste of red juice more than the green juice, and as my family and friends have noted I'm partial to red food and red objects..that might have something to do with it and I'm a fan of beets whereas not a great fan of spinach. 

Beets are the sweetest of all the veggies as in their sugar content is the highest which makes it a rather pleasantly sweet tasting juice. Beets are also are chock full of other goodness see below.

Benefits of beet juice

  • Helps treat acne and other skin problems caused by inflammation and toxins.
  • Increases stamina if consumed before a workout
  • Beets contain betalain which is a  powerful antioxidant, anti-inflammatory, fungicidal and aid in detoxification
  • Cooked  or fermented beet (like pickled beet), contain a lower amount of healthful nutrients for blood pressure benefits will decrease. By juicing, you are going to get 100% of the phytonutrients (plant chemicals).
  • Lowers blood pressure
  • Good source of nitrates, folate, vitamin A, C,  fiber and manganese
  • Relieves constipation
  • Research that indicates that betalain may help fight cancer.
  • Beets contain oxalic acid which dissolves inorganic(bad) calcium deposits in the body which  cause heart-disease, a narrowing of the arteries and arthritis.

Warning:If you have never eaten beets before try a small amount to ensure you are not allergic to them.


For additional information on the benefits of beet juice:


 If you haven't signed up for my email list yet, sign up immediately so that you won't miss my healthy tips and recipes in the future – they will come straight in your inbox. 

Oh and do stay in touch on FacebookInstagram and Twitter. 


Friday, 3 October 2014

Easy Way to Lose Weight and Get Healthy: Super Detox Green Juice

Dear Readers,

Today I would like you to be a part of my healthy lifestyle journey by sharing with you my first ever healthy recipe.Using this super detoc green juice I lost 1 pound in just 3 days, and 2 in a week! In the past I've shared recipes of my baking adventures as I have a bit of sweet tooth, I loved to bake and gorge on desserts much like a Cookie Monster- I kid you not. 

But this year after seeing myself in photos from our holiday in Dubai, I had the painful realisation that all my jeans/tops didn't conspiratorially shrink in the wash.  

Nope- I'd gained weight. 

I was appalled at the saddlebags, pouch, and bat wings that seemed to make a trolling appearance in every pic. (Incidentally, my analogue weighing machine was kind enough to lie to me..its quite old..and weighing myself on a shiny new electronic one gave me a nasty shock.  

That led to the discovery of the Jillian Michael's  30 day shred which did absolute wonders for both weight loss and overall fitness level. In order to maintain my new weight (and maybe lose an extra few lbs), I started doing a lot of research on nutrition, food deficiencies and much more.

I have struggled with staying healthy, feeling bad about not doing enough or being as motivated to stick to a program to see results. 

Sometimes I blamed hormones for my sugar cravings, or social occasions such as Eid, where healthy food is scarce. I know some friends who say that its their genetics, their mom was the same after she had kids. 

Other times I find it too difficult or expensive to follow fancy diets with hard to source ingredients or ones that leave a substantial dent in your wallet. 

The truth is you can lose weight (with exercise more on that in other posts) and healthy diet which is easy delicious and healthy without breaking the bank. There is no need to waste time feeling guilty.I  I will tell you the things I wish I had known earlier. 

I will tell you exactly what to and how to do it.  

All the recipes  that I post have been tried and  tested and tweaked by myself and contain ingredients that are easily available. 

Similarly, there is no need to go out and buy fancy equipment, if you have juicer already great,  if not, a blender will do just fine. You don't need to be a Masterchef, or spend hours slaving in the kitchen to make my recipes.


Today I am going to share one of my recipes that helped me lose 1 pound in only 3 days. It also reduced the size of my belly bulge by a whole inch by getting rid of the stubborn belly bloating.

 If you haven't signed up for my email list yet, sign up immediately so that you won't miss my healthy tips and recipes in the future – they will come straight in your inbox. Oh and do stay in touch on Facebook, Instagram and Twitter. 


Green Juice Recipe- No juicer necessary
Preparation Time 10 mins
Serving Size 1

Ingredients 

1 cup of water 
half cup of ice cubes
1.5 cups spinach (washed) You cut it into 2 inch strips to make it easier to blend
2 green apples cored
1 cucumber peeled
a handful of parsley washed
a handful of mint washed
1 inch piece of ginger peeled
Juice of 1 lemon

*Optional 1 TBSP ground flaxseed powder, 1 Tablespoon almond powder

Method: 

  1. Place all items in blender in the order above, ( the important thing being water is poured in first in order get things moving). 
  2. Blend until it forms a green smoothie like mixture.
  3.  If you like your juice with pulp pour into glasses and  stir and drink slowly swishing it around your mouth to activate digestive enzymes and really absorb the nutrient value from  the green goodness.
  4.  --However if you like it smooth strain through a fine sieve, press the pulp with spoon to get the maximum juice out of it.
*Optional  Add a tablespoon of ground flax seed and ground almonds to add some protein power and nutty flavour to the green juice.

Consume immediately or store in an airtight container in the fridge for up to 24 hours. 
Drink on an empty stomach for best results.

I personally like it with pulp as I don't want to lose the benefit of all that fibre in the pulp which can help you stay regular and also give you a feeling fullness which helps you fight those midnight hunger pangs. 
Fibre also absorbs fat in your diet flushing it clean away from your system.

If you are using this as an aid to weight loss then I suggest drinking the green juice with pulp and as a meal replacement. 

  • Breakfast was PB sandwich (brown bread)   and my cant live without glass of buttermilk/laban/Activia.
  • Lunch was salad with a side of  plant based protein (lentils, beans) and rice. (I'm avoiding animal based protein as I know I will be overdosing on it during Eid.)
  • I replaced my dinner with green juice for three days, with some yoghurt with ground flaxseed and ground almonds to add some protein power. Ensure that you drink 8-10 glasses of water during the day
  • I lost  a pound in 3 days, I felt 'lighter' and it had a cooling, refreshing effect on me.
  • After 3 days were over I continued using the green juice it as supplement to my diet rather than as a meal replacement. 

Benefits of Green Juice  

  • It helps you get 4 of your 5 a day of fruits and veggies nutritional requirement
  • At around 200 calories it is a pretty good meal replacement for those on a calorie restricted diet for weight loss, you can add more protein to the meal to suit your daily calorie requirement and it is proven to aid weight loss
  • Excellent source of Vit K, Potassium, iron and Vit C,  the nutrients will leave your body more energised, more PH balanced and more healthy.
  • Excellent source of phytochemical leaving you more boosts your immune system 
  • Brighter  clearer and healthier looking skin- now who doesn't want that?
Be sure to give it a try and let me know how it goes ...

Misha 'Go Green' iCan 

Wednesday, 26 December 2012

Chewy Red Velvet Chocolate Chip Cookie Best Recipe Ever


Red velvet chocolate chip cookies, they look more maroon in reality and for some reason the pic refused to rotate!


Dear Readers,

I'm so excited as I type this post that I'm making more typos than usual.
I have discovered an amazing recipe for Red Velvet Chocolate Chip Cookies, I didn't even know such a heavenly  dessert existed until now, I feel cheated. How could I have not discovered this recipe sooner?
As I'm a fan of both Red Velvet Cupcakes/Cakes and Chocolate Chip Cookies, I guess it was only a matter of time I would stumble across this culinary masterpiece!

I like baking things from scratch as I can taste the preservatives in box mixes (I can I swear) and its definitely the healthier option.

Indulgently rich they will be gone before you know it.

Thanks to a wonderful blogger at sweeteats.com for sharing this(link below)

Recipe via How sweet it is

Red Velvet Chocolate Chip Cookies
makes 12-15 cookies
1/2 cup butter around 113g
1/2 cup sugar
1/2 cup brown sugar
1 egg
1 teaspoon vanilla
1 1/2 cups all purpose flour
1 teaspoon baking soda
1/4 teaspoon salt
1/3 cup cocoa powder
1 teaspoon red food coloring
1/2 cup chocolate chips
Preheat oven to 375 F or 190 C

  1. Leave butter outside to soften, this is essential if its hard or melted the butter will mess up the batter.
  2. Cream butter and sugars together until fluffy in the bowl of an electric mixer. Add egg and vanilla and combine until smooth. 
  3. Beat in red food coloring. Be careful with this  step as it can get a bit messy if the colouring spills on your fingers or counter top- mine turned out darker because I used a bit more than 1 tsp of food colouring.
  4. Stir in cocoa, flour, baking soda and salt until just combined, scraping down the sides when needed. 
  5. Fold in chocolate chips.
  6. Using an ice cream scoop, scoop out 1-2 tablespoons of dough and set on baking sheet. You may want to flatten the mounds a little for a cleaner shape.
  7. Bake for 10-12 minutes. 
  8. Enjoy with a hot beverage of your choice! Milk, tea or coffee. Don't curse me when it ruins you attempts to watch your weight. This is a wickedly indulgent treat :-).

Wednesday, 30 November 2011

Red Velvet Cupcakes Recipe- Best recipe ever!

My youngest sibling is a regular customer of The Hummigbird's Bakery, hence when he was over I asked what was his favourite cupcake and he said Red Velvet. He's their biggest fan and he loves most of their cupcakes, I was going to experiment with Chocolate Orange- but as he said that was flavour that he actually disliked- I decided to make Red Velvet Cupcakes from their recipe book Cake Days. Apparently the author Tarek Malouf, was having a book signing and festive frosting demo at John Lewis in London. I hope someone filmed or does an inspired youtube tutorial.

I followed the recipe to a tee, as I had to satisfy someone who had tasted the real thing! Everyone loved it. The cupcakes were moist, with a hint of chocolate and  the cream cheese frosting is divine! One cupcake is just no enoug I was eating 3 a day! ( Munch eat you heart out :-P)

Red Velvet Cupcake Recipe

Recipe text ©Tarek Malouf & The Hummingbird Bakers,
Photography: Mine!

For the red velvet cupcakes:
Makes 16 cupcakes
  • 120g unsalted butter, at room temperature
  • 300g caster sugar
  • 2 eggs
  • 20g cocoa powder I used Hershey's Cocoa powder <3
  • 40ml red food colouring (preferably Dr. Oetker's as red food colourings vary in strength)
  • 1 tsp vanilla extract
  • 240ml buttermilk (laban)
  • 300g plain flour
  • 1 tsp salt
  • 1 tsp bicarbonate of soda
  • 1 tbsp white vinegar
For the cream cheese frosting:
  • 600g icing sugar, sifted
  • 100g unsalted butter, at room temperature
  • 250g cream cheese, cold

You'll also need:
  • 12-hole cupcake tray, lined with large cupcake cases

Method

  1. Preheat the oven to 170°C/325°F/gas mark 3.
  2. Put the butter and the sugar in a freestanding electric mixer with a paddle attachment (or use a handheld electric whisk) and beat on medium speed until light and fluffy and well mixed. 


Turn the mixer up to high speed, slowly add the egg and beat until everything is well incorporated.

In a separate bowl, mix together the cocoa powder, red food colouring and vanilla extract to make a thick, dark paste. Add to the butter mixture and mix thoroughly until evenly combined and coloured (scrape any unmixed ingredients from the side of the bowl with a rubber spatula).


Bloody knife- good for Halloween?

Turn the mixer down to slow speed and slowly pour in half the buttermilk.


Beat until well mixed, then add half the flour, and beat until everything is well incorporated.


Repeat this process until all the buttermilk and flour have been added. Scrape down the side of the bowl again. Turn the mixer up to high speed and beat until you have a smooth, even mixture.

Turn the mixer down to low speed and add the salt, bicarbonate of soda and vinegar. Beat until well mixed, then turn up the speed again and beat for a couple more minutes.


Spoon the mixture into the paper cases until two-thirds full (I use an ice cream scoop) and bake in the preheated oven for 20–25 mins, or until the sponge bounces back when touched. A skewer inserted in the centre should come out clean. Leave the cupcakes to cool slightly in the tray before turning out onto a wire cooling rack to cool completely.

Meanwhile for the cream cheese frosting: Beat the icing sugar and butter together in a freestanding electric mixer with a paddle attachment (or use a handheld electric whisk) on medium-slow speed until the mixture comes together and is well mixed. In the beginning it will seem as though you have too much icing sugar, it helps if the butter is softened and melted this stage may take a while.

Add the cream cheese in one go and beat until it is completely incorporated. Turn the mixer up to medium-high speed. Continue beating until the frosting is light and fluffy, at least 5 mins. Do not overbeat, as it can quickly become runny.

When the cupcakes are cold, spoon over the cream cheese frosting on top., approx 2 tablespoons of frosting per cupcake.

Optional decorate with red sprinkles.


Don't miss out on great recipes in the future, find me on Facebook.


Tuesday, 25 October 2011

Homemade Pistachio Loaf Recipe


I have adapted this recipe is taken from the Hummingbird bakery's cook book Cake Days; this is the fourth recipe I've tried and the loaf turned out s’moreish, it goes without saying that you have to be a fan of pistachios to like this so don’t bake it if your audience?!/family/customer don’t like the taste of pistachios...Or worse are allergic to them.

Pistachio Loaf Recipe
Ingredients:
190g unsalted butter, plus extra for greasing
190g plain flour, plus extra for dusting in my version I used brown flour, (to be healthy) and now that I’m used to the taste of brown flour I actually dislike white flour-who’d have thought?!
190g caster sugar, I just use regular sugar, the one we get here isn’t very coarse (again a helatheir option would be brown sugar)
3 large eggs
1tsp baking powder
¼ tsp salt
25ml sour cream 45ml if you are using brown flour *if you can’t find sour cream, (it’s not available in KSA then just add a tsp of white vinegar to equivalent 45ml of fresh cream and let stand for 5 mins)
1 tsp vanilla essence
100g shelled pistachios roughly chopped
One 8.5cm x 17.5 cm loaf tin with 7.5cm sides
OR One 3.5inches x 7 inches loaf tin with 3 inch sides
For the glaze
120g icing sugar
40g ground pistachios
Method:
1.Preheat the oven to 170 degrees Celsius/325 F/ Gas Mark 3,then grease loaf tin with butter and dust with flour. Don’t be skimp on the flour, it gives the loaf the beautiful brown crust on the outside.

 2. Using a hand held electric whisk or a freestanding electric mixer with the paddle attachement, cream together butter and  sugar, until the mixture is soft and fluffy.
Add the eggs one at a time, whisking well after each addition. Scrape down the sides of the bowl to ensure that the eggs and batter are properly mixed in.
4. In a separate bowl, mix together the flour baking powder and salt.
    Divide the dry ingredients into 2 bowls.
 Tip the first bowl into the creamed mixture and whisk on slow speed until just incorporated.
Repeat with the second bowl. Next mix in the sour cream and vanilla essence.
Stir in the chopped pistachios by hand.
5. Pour the batter into the prepared loaf tin.
 Place in the oven and bake for 50-60mins or until the sponge is firm on top and a skewer inserted into the centre turns out clean (it took me 63mins).
Remove from the oven and allow the loaf to cool a little before turning it out of the tin on to a wire rack to cool completely, before applying the glaze.
6. Place the icing sugar in a bowl; add 2Tablespoons of water and mix together. This will form a fairly runny paste, if the glaze seems to thick add a little more water 1/4tsp at a time. Stir in the ground pistachios keeping a small amount aside to sprinkle on top. Pour the glaze of the cooled loaf and sprinkle with remain pistachios.
Confession: I skimped on the glaze, as my family doesn’t enjoy glaze’s much, they find it too sweet, and so my loaf doesn’t look as glazed as it should.
Let me know how your turns out if you try it.


Wednesday, 12 October 2011

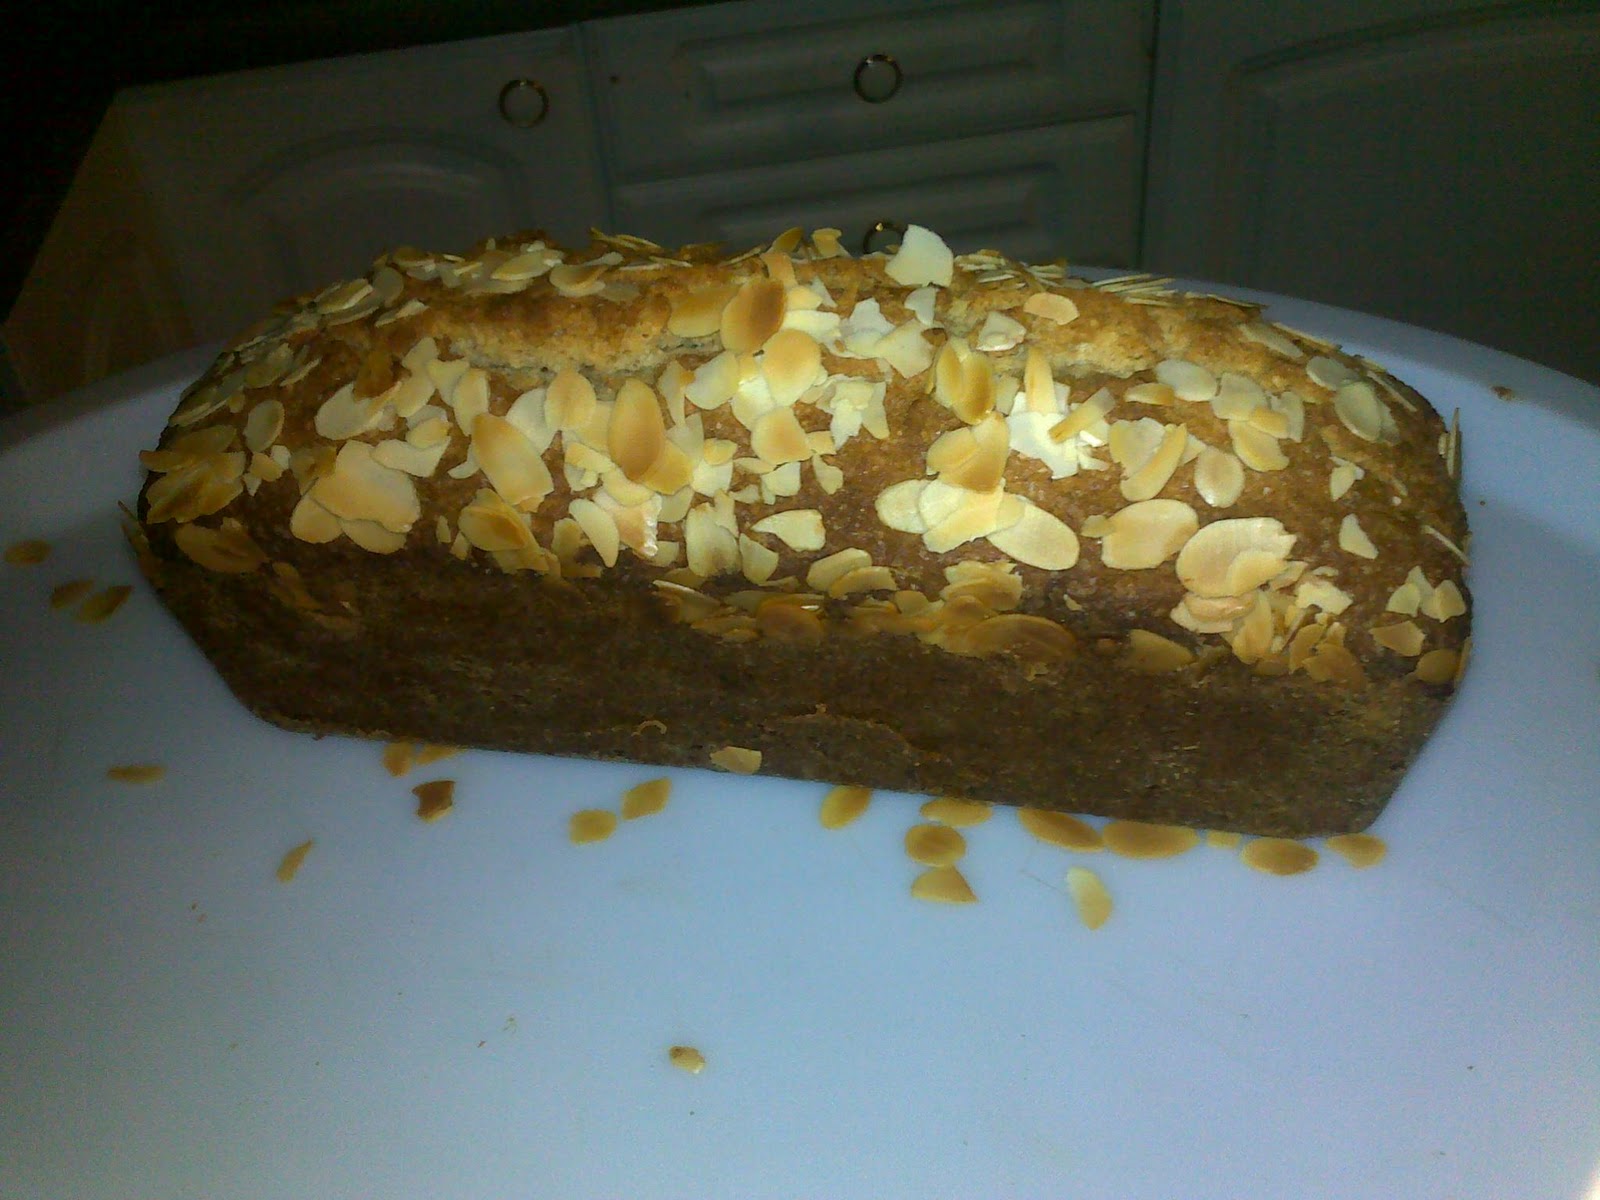
Orange, Almond, and Yoghurt Loaf Recipe with photos

Dear Readers, this is my first recipe post, and for some reason I'm very excited!

First of all, let me say this recipe is taken from the Hummingbird bakery's cook book Cake Days; it was a sweet gift from a sibling who knows I spend too much time searching for recipes online, and I'd like some tried and tested ones. Well, this is the third recipe I've tried and the loaf turned out scrumptious, if I do say so myself,its been very well received.

P.S Sorry the photos turned out a bit dark, I need to work on my photography skills.

 So without further ado, let me get on with the actual recipe.

Orange, Almond and Yoghurt Loaf Recipe
Ingredients:
190g unsalted butter, plus extra for greasing
190g plain flour, plus extra for dusting in my version I used brown flour, (to be healthy)
1 tbsp finely grated orange zest
190g caster sugar, I just use regular sugar, the one we get here isn’t very coarse
3 large eggs
60g ground almonds
1tsp baking powder
¼ tsp salt
25g plain yoghurt if you are using white flour, 35g if you are using brown flour
1 tsp vanilla essence
10g flaked almonds.
One 8.5cm x 17.5 cm loaf tin with 7.5cm sides
OR One 3.5inches x 7 inches loaf tin with 3 inch sides

Method:
1.Preheat the oven to 170 degrees Celsius/325 F/ Gas Mark 3, then grease loaf tin with butter and dust with flour. Don’t be skimp on the flour, it gives the loaf the beautiful brown crust on the outside.

 2. Using a hand held electric whisk or a freestanding electric mixer with the paddle attachement, cream together butter, sugar, orange zest and until the mixture is soft and fluffy. 


Add the eggs one at a time, whisking well after each addition. Scrape down the sides of the bowl to ensure that the eggs and better are properly mixed in.


4. In a separate bowl, mix together the flour ground almonds, and baking powder and salt.


Almonds in grinder
Ground almonds


      Divide the dry ingredients into 2 bowls.


Tip the first bowl into the creamed mixture and whisk on slow speed until just incorporated. 
 
Repeat with the second bowl. Next mix in the yoghurt and vanilla essence.


5. Pour the batter into the prepared loaf tin and sprinkle the flaked almonds on top.

 Place in the oven and bake for 50-60mins or until the sponge is firm on top and a skewer inserted into the centre turns out clean (it took me 63mins).
Remove from the oven and allow the loaf to cool a little before turning it out of the tin on to a wire rack to cool completely.


Serve on its own, or with a cup of tea, or mug of coffee.

Bon Appetit!
Enjoy and let me know how it turns out for you.