|
| Finished patchwork quilt/duvet topper |
Dear Readers,
You may have read about my first ever DIY which was bright '
Sunshine' patchwork duvet cover tutorial.
After I finished that project, would you believe I still had assorted pieces of fabric leftover from my mum's various projects, so I decided on doing another patchwork duvet/quilt topper.
This one has a more spring/'summer bloom' theme to it.
I think it looks better in real life than the finished pics becasue of how some of the prints reflect light.
Things you will need:
6 types of fabric, ideally 3 plain and 3 printed, ideally to alternate. You can use whatever you have whatever works for you.
The amount you need for each fabric depends on what
size quilt topper/ duvet cover you would like to make.
I was making one for a king size duvet cover which is 220cm by 225cm.
The pattern requires us to make a square quilt made up of 13 squares.
So each square will be Size of quilt +1cm/13 in my case 220+1/13 =17cm
17cm
should be the finished size of each square. that means leaving a half
cm allowance for stitching on each side, you should cut out 18cm
squares.
The pattern requires 27 squares of each fabric, thats approximately 100cm *127cm for
Fabric number 6 requires 28 squares, so you'll need a bit more fabric.
You
may require extra fabric to make sure the finished quilt covers the
bed/duvet, as the square topper is only going to be 221 cm I will add a 5
cm strip to one end, you could add two 2.5 cm to both ends.
Remember
that fabric number 6 will be the most prominent one, according to the
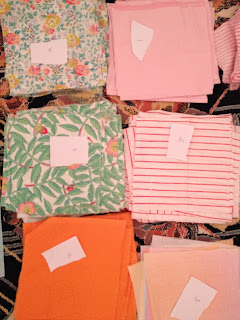
pattern, so choose carefully. In my pattern no. 6 is large green leaves with orange flowers print (middle left ), 5
the orange fabric, 4 the smalle green leaves and yellow and organge flowers(top left) 3 the light shaded fabric(bottom right) 2 red and white horizontal stripes, 1-pink
background with fine white lines printed it on it.
Other things you will need:
Scissors/ Rotary blade and Cutting board
Ruler/Quilters Square
Chalk
Matching thread. Sewing maching
Iron
Pattern:
| 6 |
1 |
2 |
3 |
4 |
5 |
6 |
5 |
4 |
3 |
2 |
1 |
6 |
| 1 |
2 |
3 |
4 |
5 |
6 |
1 |
6 |
5 |
4 |
3 |
2 |
1 |
| 2 |
3 |
4 |
5 |
6 |
1 |
2 |
1 |
6 |
5 |
4 |
3 |
2 |
| 3 |
4 |
5 |
6 |
1 |
2 |
3 |
2 |
1 |
6 |
5 |
4 |
3 |
| 4 |
5 |
6 |
1 |
2 |
3 |
4 |
3 |
2 |
1 |
6 |
5 |
4 |
| 5 |
6 |
1 |
2 |
3 |
4 |
5 |
4 |
3 |
2 |
1 |
6 |
5 |
| 6 |
1 |
2 |
3 |
4 |
5 |
6 |
5 |
4 |
3 |
2 |
1 |
6 |
| 5 |
6 |
1 |
2 |
3 |
4 |
5 |
4 |
3 |
2 |
1 |
6 |
5 |
| 4 |
5 |
6 |
1 |
2 |
3 |
4 |
3 |
2 |
1 |
6 |
5 |
4 |
| 3 |
4 |
5 |
6 |
1 |
2 |
3 |
2 |
1 |
6 |
5 |
4 |
3 |
| 2 |
3 |
4 |
5 |
6 |
1 |
2 |
1 |
6 |
5 |
4 |
3 |
2 |
| 1 |
2 |
3 |
4 |
5 |
6 |
1 |
6 |
5 |
4 |
3 |
2 |
1 |
| 6 |
1 |
2 |
3 |
4 |
5 |
6 |
5 |
4 |
3 |
2 |
1 |
6 |
Method:
1. Cut out squares of each
fabric, make sure you measure properly, otherwise you will be sorry at
some point, and then unless you have tonnes of fabric it will be too
late to do anything about it.
2. Play around with the fabric, until you can decide which fabric is going to be 1,2,3 and so on.
I would make the darkest/brightest 6, and the lightest 1,and the rest according to how they would look next to each other.
3.
Once you have decided which number to assign each fabric, place a
sticky note or piece of paper atop each pile so you don't get mixed up.
4. For the first row collect all the squares in the correct order.
Placing
the first two squares right sides facing each other stitch together
0.5cm from the edge. Flatten the seam open with your nail. Next open up
the two squares, sew on the next square in the same way until all
squares in the first row or sewn together. Cut away any lose thread,
fold and set aside.
Be accurate in your 0.5cm seams as it will matter later on.
Repeat for all rows.
5. Once you are finished with rows iron the rows and press seams open.
6.
Next carefully pin the first and second row together, making sure the
intersections/seams of the squares match up. If they don't match you
could to open it up and try and tidy up the squares.If it is still don't
panic! Don't give up- take a break. At the end of the day, the pattern
will be seen from afar, and the mistake won't be that
noticable-hopefully. :-)
Stitch together the
first two rows, roll up the finished squares of fabric as you go along
to prevent it from tugging and pulling what you are currently
stitiching.
7. Repeat until you reach the 7th row.
Then
start the same procedure from the 8th row till the bottom. This is to
reduce the bulk you have handle, and so that you only have to deal with
the full bulk of the fabric once.
Stitch the two halves together.
In my case, I needed to attach, a strip of fabric to the edge to make up the extra 5 cm of width.
If you are making a duvet cover like myself, you can simply sew a flat sheet cut to size, to get the back of the quilt.
If you have leftover fabric, you can make pillows, be as creative or as simple as you want.
Enjoy!
Tip:
Once you have laundered it, and if you are not going to use it
immediately, you could fold the cover, and store it in a pillow case,and
any matching bedsheet, and additonal pillow cases, neat and organised
storage.
|
| Finished patchwork quilt/duvet topper |
 |
| Monogrammed with a S |
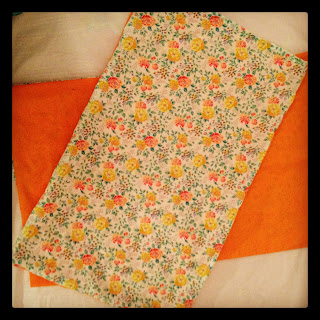 |
| Pillowcase front and back |
If you have any questions about the above tutorial , feel free to ask in the comments section below